A prototype pcb is a test version of a pcb. You use it to check your electronics design before making many copies. A prototype helps you see if your circuit works as planned. It also shows if it can be built without problems. It is like baking a few cookies to try a new recipe before making a lot for a party. This step helps you find mistakes early and fix them. It saves time and money in your electronics projects.
Key Takeaways
Prototype PCBs help you test your circuit design first. You can fix problems before making many copies. This saves you time and money.
Using a prototype helps you find mistakes early. Your final product will work better and be easier to build.
There are different types of prototype PCBs. Some are single-sided, double-sided, or multilayer. Each type fits different project needs.
You should follow a clear process. Design, test, and change your PCB until it works well. This helps your PCB meet manufacturing rules.
Prototype PCBs lower costs and make quality better. They help you avoid common problems by letting you fix things before making lots of PCBs.
Prototype PCB Basics
What is a Prototype PCB
When you make a new electronic device, you need to test your ideas first. A prototype pcb lets you do this. You use it to see if your design works in real life. This special board helps you try out different layouts and parts. If you find a problem, you can change things fast.
A prototype circuit board is not for long-term use. It is for testing, learning, and making changes. Most pcb prototypes use simple materials and have fewer layers than final boards. For example, a prototype pcb can have up to 8 layers. A standard pcb can have up to 32 layers. You also get fewer surface finish choices and less advanced features. This makes the pcb prototype faster and cheaper to make.
Tip: When you design a prototype circuit board, focus on testing your main ideas. Do not worry about making it perfect yet.
Prototype PCB vs. Production PCB
You may wonder how a pcb prototype is different from a production pcb. The main difference is in what they are used for. A prototype pcb helps you test and improve your design. A production pcb is for making many copies of a finished product.
Here is a table to help you see the differences:
Aspect | Prototype PCB | Production PCB |
|---|---|---|
Purpose | Testing and validation | Mass production for commercial use |
Quantity | Small batch sizes | Large volume manufacturing |
Cost | Higher per-unit cost for small runs | Lower per-unit cost for big batches |
Lead Time | Fast turnaround for quick changes | Longer lead time for planning and scale |
Design Flexibility | Easy to revise and experiment | Hard to change once production starts |
Quality Control | Focused on function, less strict | Very strict to meet industry standards |
Materials | Basic, less expensive | High quality, more options |
When you use a pcb prototype, you can find design mistakes early. This helps you avoid expensive errors in mass production. Production pcbs use better materials and tougher testing. They are best when your design is ready for the market.
Importance of Prototype PCB
Error Detection and Validation
When you work on a new electronics project, you want to catch mistakes before they become big problems. A pcb prototype gives you a real board to test your ideas. You can check if your circuit works as planned and spot errors early. This step helps you avoid costly fixes later.
You can use a pcb prototype to test and refine your design. This lets you see if all parts work together.
Building and testing an early sample pcb helps you find issues like wrong component placement, signal noise, or even thermal problems.
You can check for mistakes in the way you connect parts, such as connector orientation or address assignment errors.
A pcb prototype lets you test your board under real-world conditions. You can see if it meets durability and performance standards.
Note: Testing a pcb prototype helps you find and fix design flaws before you make many boards. This saves you time and money.
You can use different types of tests to make sure your pcb works well. Here is a table that shows some common tests:
Testing Type | Description |
|---|---|
Functional Testing | Checks if all electrical parts on the pcb prototype work under all conditions. |
Environmental Testing | Tests the pcb in hot, cold, or humid places to see if it lasts. |
Electrical Testing | Makes sure voltage and current match your design. |
Physical Inspection | Looks for defects or mistakes on both sides of the pcb. |
When you use a pcb prototype, you can also improve your design step by step. You test, find weak points, and make changes. This process makes your final product more reliable and ready for the market.
Manufacturing Readiness
A pcb prototype does more than just check if your circuit works. It also helps you see if you can build your board the right way. Before you start mass production, you need to know if your design is easy to make and meets all rules.
You can use a pcb prototype to test if your board follows manufacturing rules, like trace width and spacing.
You can try out different assembly methods, such as soldering and placing parts, to see what works best.
A pcb prototype lets you check if all parts fit and if the board can be made without problems.
You can use the same manufacturer for both your prototype and final boards. This keeps quality high and helps with traceability and documentation.
Tip: Using a pcb prototype helps you meet industry standards, like IPC, and pass quality checks before mass production.
You can follow a step-by-step process to make sure your pcb is ready for manufacturing:
Build a pcb prototype after you finish your schematic design.
Test the prototype for electrical performance and physical fit.
Make changes if you find any problems.
Use quality checks like Automated Optical Inspection (AOI) and X-ray inspection.
Make sure your pcb prototype meets all industry and safety standards.
By using a pcb prototype, you reduce the risk of costly errors during manufacturing. You also make sure your electronics project meets all rules and works as planned. This step gives you confidence before you move to full production.
Types of PCB Prototype
Single-Sided and Double-Sided
The simplest prototype circuit board is the single-sided pcb. It has just one copper layer for all the parts. You use single-sided prototypes for easy circuits or to try new ideas fast. These boards are good for things like LED lights, calculators, or small power supplies.
Double-sided pcb prototypes have copper on both sides. This extra layer lets you add more parts and make harder circuits. You might use double-sided boards for vending machines, smartphones, or control systems.
Here is a table that shows what each type is used for:
PCB Type | Typical Applications |
|---|---|
Single-Sided PCB | LED lighting boards, calculators, power supplies, simple household appliances, prototyping, hobbyist projects |
Double-Sided PCB | Vending machines, smartphones, computers, industrial control systems, medical devices, automotive appliances, high-performance computing machines |
Tip: Use a single-sided prototype for easy projects. Pick double-sided boards if your design needs more space or is more complex.
Multilayer PCB Prototype
If your design is very complex, you may need a multilayer pcb prototype. These boards have many layers of copper and insulation stacked together. You can fit lots of parts in a small area and use special features like fast signals. Multilayer prototypes are used in smartphones, medical tools, and advanced computers.
Making and testing a multilayer prototype is harder. You must plan each layer with care. Testing is tough because you cannot see inside the board. Here is a quick table to compare them:
Feature | Single-Layer PCB | Double-Layer PCB | Multilayer PCB |
|---|---|---|---|
Low | Medium | High | |
Design Difficulty | Simple | Moderate | Complex |
Manufacturing Time | Shortest | Moderate | Longest |
Testing and Repair | Easier | Moderate | More difficult |
Pick a multilayer prototype if your project needs lots of connections or must fit in a small space.
Specialized Prototype Circuit Board
Some projects need special prototype circuit boards. You might use a flexible pcb for a wearable gadget. A rigid-flex board is good for things that bend and fold. HDI boards help you fit many parts in a tiny area. High-frequency boards use special stuff for fast signals, like in 5G or microwave devices.
Here are some common types of special prototype circuit boards:
Rigid pcb: Used in cars, planes, and electronics.
Flexible pcb: Good for wearables, medical tools, and IoT gadgets.
Rigid-flex pcb: Has stiff and bendy parts for tricky shapes.
HDI pcb: Fits more parts in less space for small electronics.
High-frequency pcb: Handles fast signals in 5G and microwave circuits.
Heavy copper pcb: Deals with heat in power electronics.
Metal core pcb: Helps cool LED lights and power modules.
You can also get custom pcb prototypes for your exact needs. These special boards let you try new ideas and test limits. When you use different types of prototype circuit boards, you can make more creative and powerful products.
PCB Prototype Process

Making a prototype circuit board starts with a good plan. You follow steps to turn your idea into a working pcb prototype. Each step helps you find problems early. You can fix your design before making lots of boards.
Design and Fabrication
First, you draw the schematic for your pcb. This shows how each part connects. Next, you use software to lay out the board. You make Gerber files for the manufacturer. These files tell them how to build your pcb prototype.
Here are some things to remember when designing:
Pick the best materials, like FR4 or polyimide, for your project.
Add test points so you can check your work later.
Follow datasheet rules to avoid mistakes.
Make silkscreen labels clear for easy assembly.
After you finish the design, fabrication begins. The manufacturer checks your files and gets the layers ready. They drill holes and add copper traces. They put on a solder mask and silkscreen. Before sending the board, they test it to make sure it works.
Assembly and Testing
When you get your pcb prototype, you add the parts. You can solder by hand or use machines for bigger jobs. After you put the parts on, you need to test your prototype.
Some common ways to test include:
Automated Optical Inspection (AOI) to find assembly mistakes.
Flying Probe Test for quick electrical checks.
Manual tests to see if your circuit works.
You might use tools like oscilloscopes or thermal cameras. These help you find hidden problems. Testing helps you spot issues with connections, heat, or signal noise.
Tip: Put test points where you can reach them easily. This makes fixing problems much faster.
Iteration and Improvement
You almost never get everything perfect the first time. Iteration means you test, learn, and make your pcb prototype better. Each round of changes helps you get closer to a good product.
Here’s how iteration helps you:
You find design mistakes early and fix them before making many boards.
You get feedback from users or engineers to make your board work better.
You compare results after each change to see if things improve.
Research shows that companies using this process make better products faster. You save time, spend less money, and get higher quality. Custom pcb prototypes let you try new ideas and change things quickly. By repeating the steps, you make sure your final pcb works well and meets your needs.
Benefits and Challenges
Cost and Time Savings
Prototype PCBs help you save money and time. You can make your design cheaper by using fewer layers. Standard parts also lower costs. Making your board easy to build saves more money. If you use fewer layers, you can save up to 30%. Using standard parts saves about 15%. These savings add up fast. You might cut your total costs in half.
Design Optimization Strategy | Estimated Cost Savings (%) |
|---|---|
Reducing layer count | 15 – 30 |
Optimizing board size | 10 – 20 |
Using standard components | 5 – 15 |
Improving manufacturability | 10 – 25 |
You save time because you find mistakes early. Testing with a prototype helps you spot problems before making many boards. You spend less time fixing errors later. You may need to test a few times. Having a working prototype helps you finish faster. You can get your product ready for sale sooner.
Tip: Pick a good pcb prototype maker. This helps you avoid extra costs and delays.
Quality Improvement
Prototype PCBs help you make better products. You can test for errors like signal problems or heat issues. Early tests let you fix these before they get worse. Many companies see fewer defects when they use prototypes. Defects can drop by half.
You can check if your board is safe and meets standards.
You can run tests for signals and heat.
You can make sure your board works in real life.
Using prototypes makes your product more reliable. You feel sure your final board will work well. This is a big advantage of prototype circuit boards. But you must spend time and effort on testing.
Common Issues and Solutions
You may face problems with prototype PCBs. Some common issues are missing solder masks, acid traps, and soldering mistakes. Engineers also have trouble with design gaps and wrong parts. These are some advantages and disadvantages of prototype circuit boards.
Common Issue | Solution |
|---|---|
Missing solder masks | Careful application and automated inspection |
Acid traps | Quality control during etching |
Soldering defects | Visual checks and automated testing |
Layer misalignment | Optical alignment and registration marks |
Material selection issues | Choose proper laminates and optimize process |
You can fix most problems by following good steps. Set your needs early and make clear test plans. Talk often with your manufacturer. Pick a maker who knows about prototyping and quality checks. This helps you avoid mistakes and makes moving to production easier.
Prototype PCBs help you test your ideas before making many boards. You can find mistakes early and fix them. This saves money and makes your product work better. Fast prototyping lets you change things quickly. You can bring new products to stores faster.
Many companies now use flexible, HDI, and eco-friendly PCBs. Smart devices and IoT make these types more popular. If you focus on prototyping, you help create better electronics for the future.
Stage | Purpose | Outcome |
|---|---|---|
Check if your circuit works | Find and fix early mistakes | |
Iterative Refinement | Make layout and parts better | Solve heat and electrical problems |
Pre-Production Validation | Make sure it can be built and works well | Get a design ready for many copies |
FAQ
What is the main purpose of a prototype PCB?
You use a prototype PCB to test your circuit design before making many boards. It helps you find mistakes, check if your idea works, and make changes quickly. This step saves you time and money.
How many times should you prototype a PCB?
You should prototype as many times as needed to fix errors and improve your design. Most projects need two or three rounds. Each round helps you get closer to a perfect final product.
Can you reuse a prototype PCB?
You can reuse a prototype PCB for simple tests or learning. If you change the design or parts, you should make a new prototype. Old boards may not show new problems.
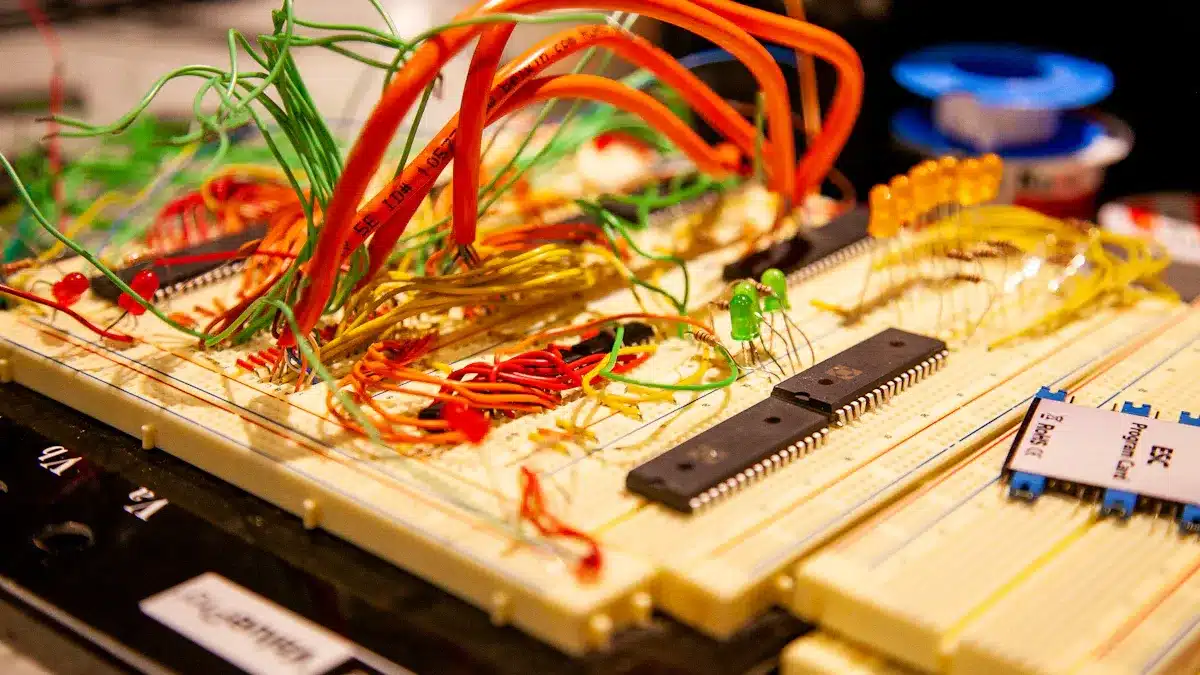
What is the difference between a breadboard and a prototype PCB?
A breadboard lets you build circuits without soldering. You use it for quick tests. A prototype PCB is a real board with soldered parts. It gives you better results and helps you test your final design.
How do you choose the right prototype PCB type?
Tip: Pick a single-sided board for simple circuits. Choose double-sided or multilayer boards for complex designs. Use special boards, like flexible or HDI, for unique needs. Always match the board type to your project’s size and function.
See Also
Understanding PCB Design And Its Importance In Electronics
The Critical Role Of PCBA Prototyping In Innovation
Essential Facts About PCBA Prototypes And Their Applications
Exploring PCBA In Electronics And Its Key Significance
The Functionality And Importance Of PCBA Motherboards Explained